How To Child Proof Your Home
My baby is now 10 months old, and he is a fiercely independent crawler! It’s amazing how fast he can get to the complete other side of the house and to where “no one” is watching.
In addition to his crawling mobility, he is also now standing while holding onto furniture.
I’ve come to grips with the fact that I no longer have an infant — it’s time to baby proof our home for a toddler!
See how we’ve created a child proof house for our son’s crawling and learning-to-stand stage…
From 6 months to 1 year of age, Baby is pulling up to stand, crawling and drawn to sharps edges. Corner padding, foam play mats, carpeting and rugs will all help. You do however have a bigger problem… everything goes in their mouth. Everything. The only way to baby-proof this properly is to keep things tidy and small objects out of reach. As Baby’s vision gets better, they can focus on tiny details for the first time. This is a very intriguing new skill, and when they master the motor skills to pick up those tiny pieces, the automatic question is “I wonder what it tastes like?”
~ TwinPickle
Child-Proof Home Checklist: 16 Important Things
Each house is different. Start by getting down to your baby’s perspective and crawling on your hands and knees.
Toddler proofing requires you to look for potential hazards in your home from your child’s unique perspective.
These are some of the areas you’ll want to child proof:
#1 – Clothes Iron

What to do: Keep the iron out of baby’s reach at all times — regardless of whether the iron is hot or cold.
Why: One tug of the ironing cord could send the heavy iron downward onto your child. The cord can also be a strangulation hazard for a toddler. Even if they don’t pull on it, they could trip over it.
How to do it: Unplug the iron when not in use. Also, put away the clothes iron (and make sure the dangling cord isn’t still reachable) any time you have to leave the room or stop ironing. My husband irons his shirt for work every day. He now makes a point to put the iron away immediately after use. If possible, try to iron when your toddler is napping or playing in a safe, separate area.
#2 – Doors
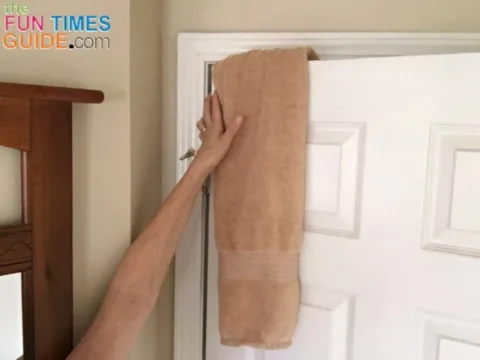
What to do: Prevent baby from opening and closing doors to the rooms inside your house.
Why: Toddlers can get pinched fingers. Also, your baby could end up on the other side of the door — where you can’t see what they’re doing.
How to do it, for rooms that are not used very much: Keep the doors to those rooms closed at all times — that way, you will have fewer areas to monitor and supervise.
How to do it, for rooms that are used often: We fold a towel width-wise in quarter sections (keeping the length) and then place it over top of the open door near the hinge side. This prevents baby from crunching their fingers as they explore the door’s swinging action. The door won’t be able to close with the towel close to the hinge, and the door cannot come into contact with the door frame either. The towel is too high for baby to reach — yet it’s easy for you to remove if you want the door closed.
#3 – Electrical Outlets
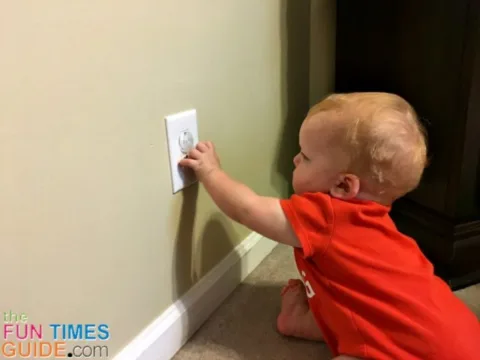
What to do: Keep them covered at all times.
Why: So baby cannot insert a finger (or a toy) into an outlet and become electrocuted.
How to do it: Insert child proof outlet plug covers in all of your exposed outlets. Block or hide other outlets with furniture. If there happens to be an exposed outlet on a wall, be sure to keep furniture away from it — so your toddler cannot climb up and reach the outlet that way. For an extra layer of security, consider these:
- Tamper-resistant receptacles (TRRs) – These are the most effective way to prevent electrical shock. TRRs have built-in shutters that block access to the electrical contacts unless a plug is inserted with equal pressure on both prongs.
- Self-closing outlet cover plates – These replace your standard outlet covers and have built-in shutters that block access to the outlets. They are more expensive than regular outlet covers, but they offer the same level of protection as TRRs.
#4 – Electrical Cords

What to do: Keep cords from getting tangled in baby’s hands. My baby has a thing for cords — so the goal is simply to keep them all out of his reach.
Why: One tug on an electrical cord could send the item at the end of that cord (and anything else in its path) tumbling down on baby.
How to do it: Route all exposed cords behind furniture and secure them in place using a sticky 3M Command Hook. Or use zip ties to pull together cords and then tuck them away. Other products I’ve seen that could be helpful:
- Cord covers – These long, plastic tubes cover entire cords, making them less appealing to chew on and difficult to grab. They come in various lengths and can be cut to size.
- Cord shorteners – These handy tools wrap up excess cord, keeping them out of reach and preventing tripping hazards.
- Power strip covers – These enclose the entire power strip, hiding multiple cords and outlets at once. There are affordable plastic ones, nicer wooden ones, and even high-end wood power strip covers.
#5 – Window Blinds
What to do: Keep them up high — out of baby’s reach.
Why: Dangling cords could strangle a curious toddler.
How to do it: Tie window blind cords together and secure them in place — high up out of reach. Or use window blind safety cord wraps. Be sure to also move furniture (including the baby crib or toddler bed) away from windows to prevent your child from climbing onto the furniture to get to the blinds.
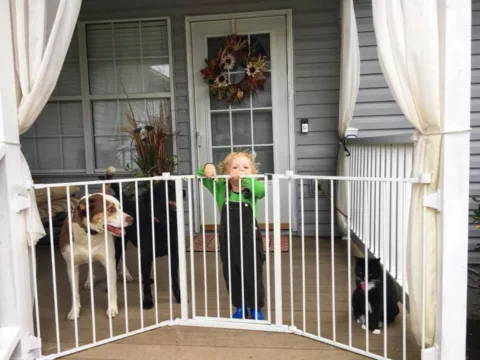
#6 – Stairs, Halls, and Doorways
What to do: Keep stairways, hallways, porches, and entrances to other rooms in your house blocked — so baby can’t leave the room.
Why: You won’t be able to keep your eyes on your baby if they are able to find a way out on their own.
How to do it: Install child proof baby gates to keep your toddler more contained within 1 or 2 rooms. Make sure the gates are at least 36 inches high and are appropriate for the age and strength of your child. If it mounts securely to the wall, then it cannot be easily dislodged by your toddler. (Hardware-mounted gates are generally more secure than pressure mounted gates.) Don’t forget to block off the bottom and top of any stairs! This is the walk-thru baby gate that we use.
#7 – Small Items on the Floor
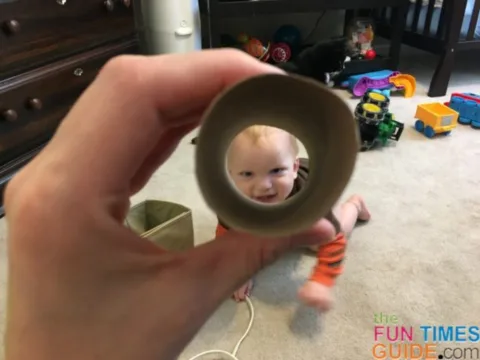
What to do: Keep small items off the floor and out of baby’s reach. My little one is at the stage where everything goes in his mouth — so I’m always scanning the floor for potential hazards (paper, plastic, wrappers, dog food remnants, etc).
Why: Toddlers can choke on small items.
How to do it: A toilet paper tube makes a great DIY “choke tester tool.” If an item can fit into an empty toilet paper tube, then it is small enough for your baby to choke on and should be removed from the area. Here are a few other tips:
- Minimize floor clutter – Pick up toys, games, and other small items after playtime. Regularly scan the floor for dropped objects that your toddler might find.
- Be aware of broken toys – Discard any broken toys that have small, loose parts.
- Choose age-appropriate toys – When buying toys, always check the age recommendation on the label.
#8 – Cabinets
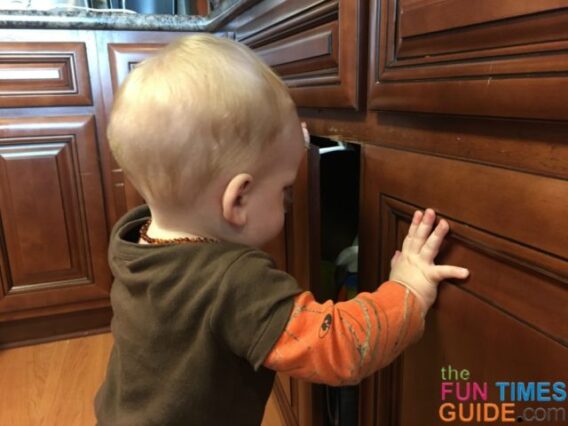
What to do: Make sure that every cabinet door in your home is securely closed at all times.
Why: Toddlers love to explore, and they can find all kinds of fun (dangerous) new things to play with behind cabinet doors.
How to do it, if your cabinets don’t have pulls: Use behind-the-door spring-loaded child proof cabinet safety latches. They’re easy to install and operate, but they make it difficult for babies to open the cabinet doors. The latch is designed to catch the door from opening very far, yet easy enough for an adult to open — by pushing down to release the catch with minimal inconvenience.
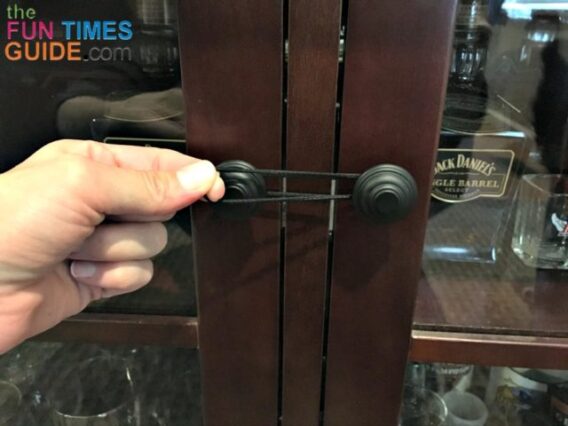
How to do it, if your cabinets do have pulls: Attach rubber bands to the paired cabinet pulls, or use a product like these sliding child proof cabinet locks. That way, your cabinet doors will stay closed at all times — and baby will only be able to open the doors very slightly if they’re using all of their strength.
#9 – Refrigerator Doors and Kitchen Drawers
What to do: Secure them closed at all times.
Why: A curious toddler could become trapped behind doors, and tiny fingers could become pinched while opening and closing drawers.
How to do it: Use child proof safety straps. They install in minutes, and the adhesive removes easily with heat from a hair dryer. This multi-use lock is our favorite for toddler proofing.
#10 – Sharp Items (Scissors, Knives, Sewing Supplies, Etc.)
What to do: Remove them from your baby’s reach.
Why: A toddler can become seriously hurt. Or, they could accidentally hurt a beloved family pet.
How to do it: Keep all sharp items locked away out of reach — and get in the habit of putting them away immediately after use. Don’t overlook the “sharp” corner edges of furniture pieces — like coffee tables, shelves, and countertops. Corner protectors will absorb most of the pressure should your toddler fall onto one of these sharp corners. A DIY option would be to use foam pipe insulation or pool noodles cut to size to cover sharp edges.
#11 – TVs, Dressers, and Tall Pieces of Furniture
What to do: Secure them to the wall!
Why: A toddler could tip heavy items over while pulling to stand up.
How to do it: If you have any flat TVs which are not mounted to the wall but sitting on a piece of furniture (such as a TV stand or dresser), use child proof anti-tip furniture anchor straps to securely mount your TVs, high boy dressers, wall units, etc. These are the anti-tip wall straps that we use.
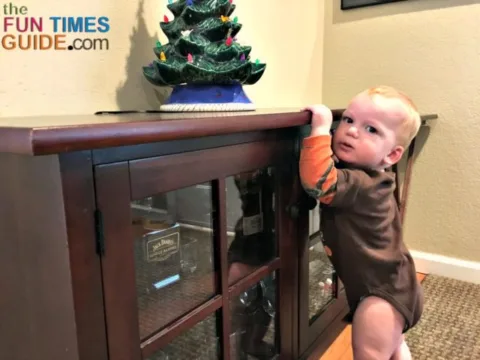
#12 – Items on Top Short Pieces of Furniture
What to do: Be mindful of items (large and small) that you place on top of furniture that’s within reach of your baby’s hands.
Why: A toddler’s curiosity for those items is heightened — as they begin to stand and hold onto night stands, couches, and other pieces of furniture. Also, toddlers are determined climbers, and anything within reach could quickly become a climbing station.
How to do it: Push items farther back on flat surfaces so baby cannot see (or reach) them. By keeping only essential items on the table, you will have less clutter — which means less for baby to grab and potentially break. You might also want to use furniture pads or double-sided tape underneath lightweight items to prevent them from sliding easily.
#13 – Toilet Lids
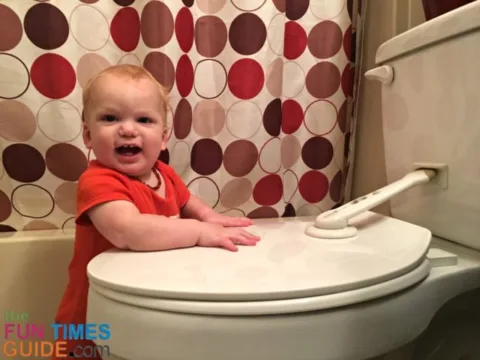
What to do: Lock the lid to the toilet — so it stays tightly closed at all times.
Why: A curious toddler could fall into the toilet and drown. Plus, some toddlers like to play with toys in the toilet water — which could clog your toilet if your child figures out how to flush the toilet.
How to do it: We installed a toilet lid lock after catching our baby with his hands on the toilet seat. We’re still not sure how we feel about it, simply because it’s not convenient to open. But it’s definitely something to consider and try — especially since this stage is just temporary. Or (especially if you have multiple bathrooms in your house), you could just keep the bathroom door closed at all times. You could also install a hook-and-eye lock on the outside of the door to keep your toddler out.
#14 – Shower Curtains
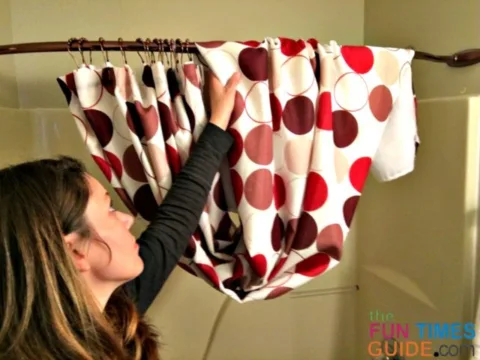
What to do: Prevent the shower curtain from being used as leverage when standing or crawling.
Why: One tug on the shower curtain could send the curtain rod, shower curtain hooks, and the shower curtain itself flying downward onto baby.
How to do it: Keep the bathroom door closed at all times. Or tie the shower curtain up out of baby’s reach. If your toddler is in the bathroom with you while you’re showering, to prevent them from becoming fascinated with the shower curtain moving, try these:
- Shower Curtain Weights – Attaching curtain weights to the bottom of the shower curtain will add stability and make it less likely for a toddler to pull it down.
- Shower Curtain Clips – These keep the curtain and the liner from billowing out and becoming a pulling target.
#15 – Pets (Cats, Dogs, Etc.)
What to do: Closely supervise your baby any time dogs and cats are roaming freely in baby’s presence.
Why: Pets and babies behave unpredictably. You never really know what will happen whenever pets and babies are in close proximity to one another — especially during the time that family pets are eating or playing with toys.
How to do it: We have dogs and cats in our home. Every member of our family has transitioned beautifully to baby, and baby appears to be accepted as part of the pack. Still… I always, without fail, make sure my baby is contained whenever the dogs are eating their food or playing with toys. It’s just not worth the risk to have your child accidentally injured and then be forced to make some awful decision as a consequence. We are constantly teaching our baby to be gentle with the cats and the dogs. He will eventually know that he is not allowed to pull on tails or provoke the pets, but their interactions together will always be closely monitored until then.
#16 – Garbage Cans
What to do: Keep your toddler out of stinky, messy trash cans.
Why: When toddlers play with toys, they learn that anything behind a door or underneath a lid is usually something worth exploring. However, dirty trash is off limits!
How to do it: Make sure that all of your garbage cans are kept behind closed doors (in a pantry, closet, or garage) — or that they are placed higher up than normal. Or, have secure lids on them to prevent a curious child from touching the contents inside. Or, use child proof safety straps that can be mounted on trash cans of any size and shape.
IMPORTANT: Please keep in mind that all of the above toddler proofing suggestions are simply deterrents. They will never replace proper adult supervision.
Toddler Proofing Also Means Setting Boundaries

One of the most important things I feel about child proofing your home is to teach your baby boundaries.
We have taught our baby not to touch certain things in our household.
With close supervision and consistent practice of telling baby “No” for items completely off limits, we’ve been able to teach our son to stay away from and not touch “off limit” items, such as:
- The cat’s food
- The dog’s water dish
- The TV wall unit
- The kitty door
- Wall outlets
- And more
Don’t get me wrong, he will still test our commitment to the meaning of “off limits” or “No” by a quick check to see if either of us are paying attention while playing within an inch of the off-limit items.
And, of course, there has been an accidental tipping of the dog’s water dish from time to time — from a moment of inattention.
But always being mindful of baby and taking the extra precautions to child proof your home will definitely provide you with some additional peace of mind!

